Here is some Technical Stuff.
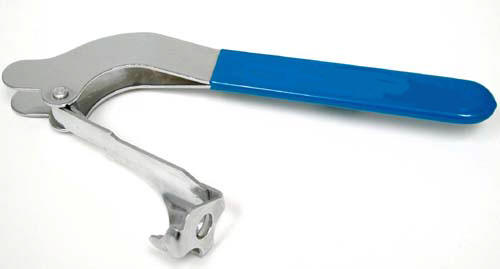
Many of you have asked how to use one of the Stand Removal Tools, So Here Goes
Click on the images to enlarge:
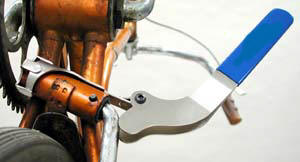
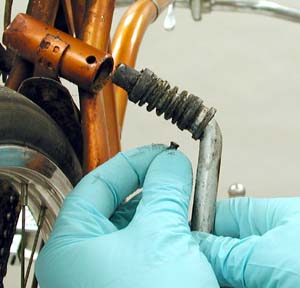
Pic 1: Shows the Stand Removal Tool in position
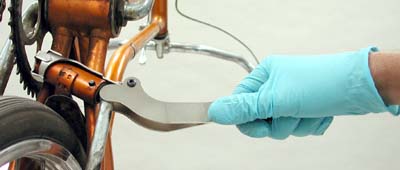
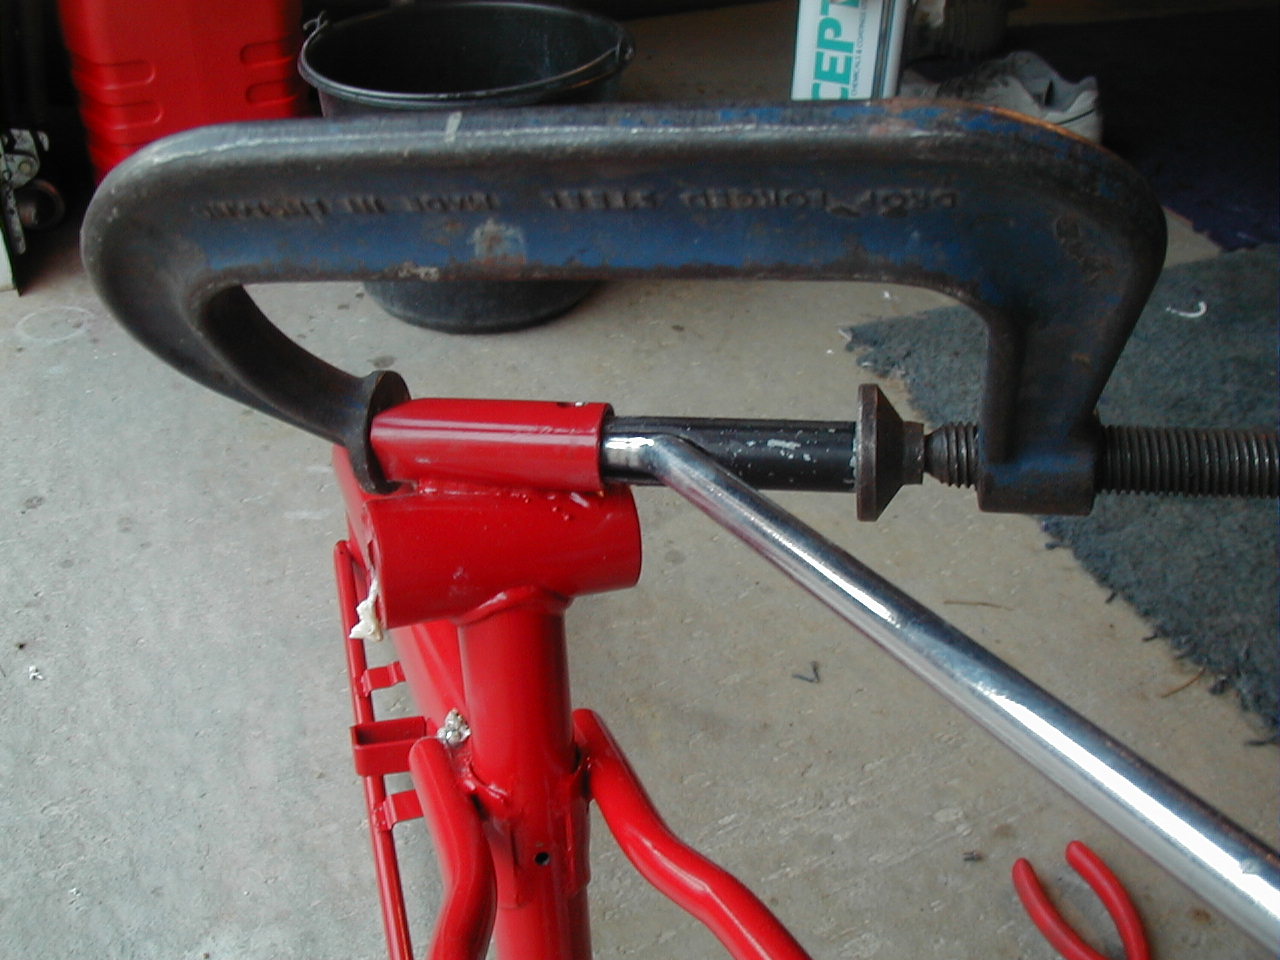
Pic 2: Down shot showing the stand compressed into the Frame,
This exposes the large hole in the stand and then with the aid of a pair of pliers you can remove the little mushroom pin.
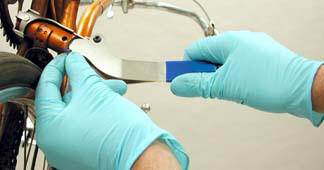
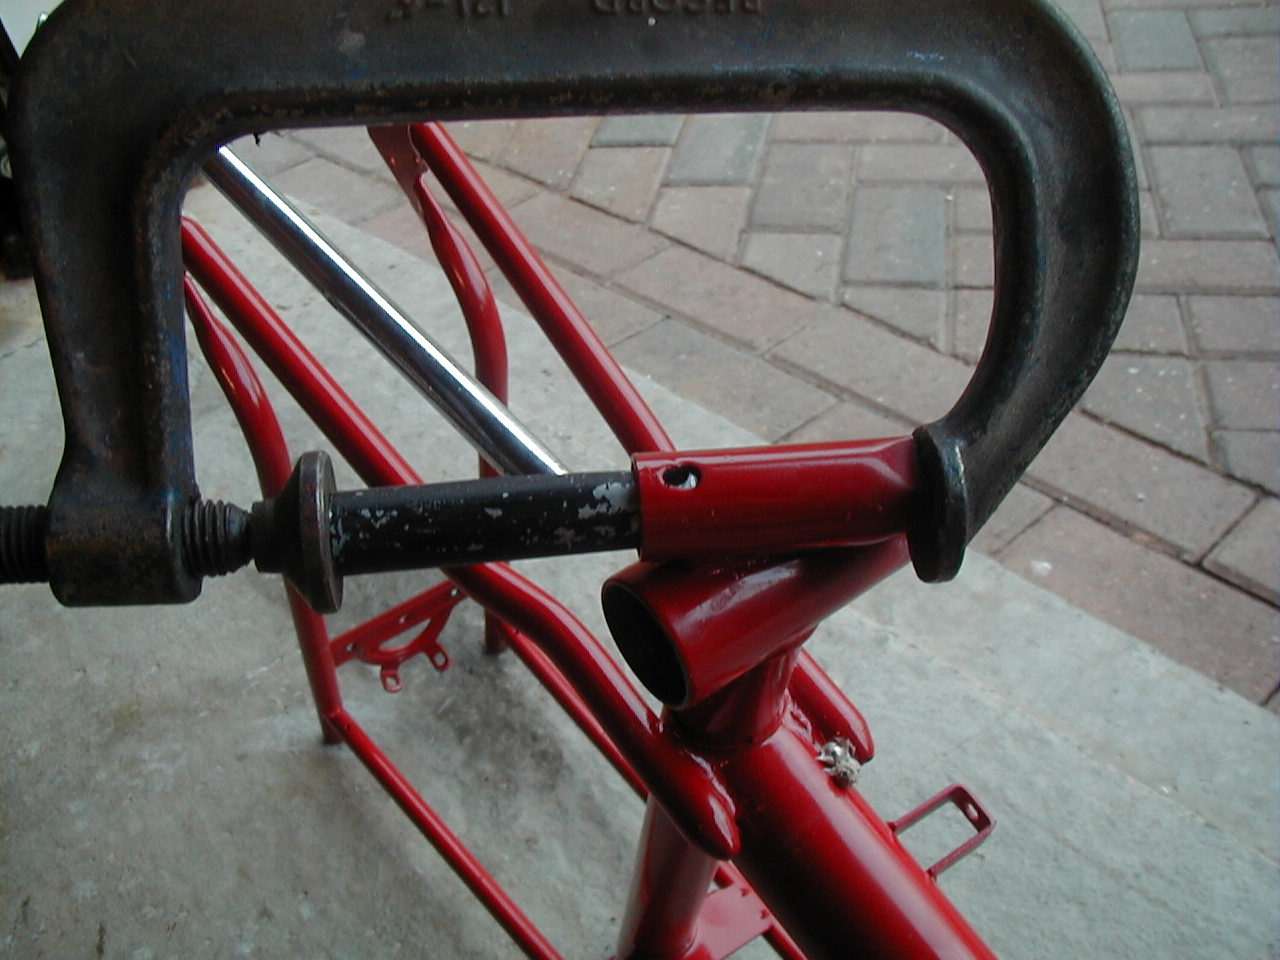
Pic 3: The pin being easily removed , Once removed the stand can be pulled out of the frame
Tools Required are a 9" G Clamp
Pair of Pliers and 2 pairs of hands makes easy work
_________________________________________________
Sturmey Archer Gear Adjustment .
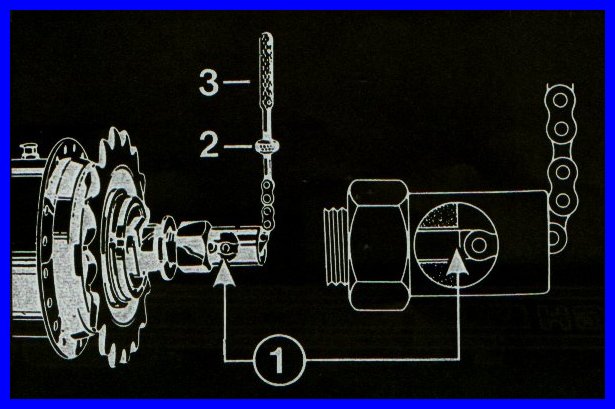
Firstly make sure the gear lever is in the middle position ( 2nd gear ) and slacken the locknut (diag2) at the hub end of the cable, so it can be easily screwed to tighten or slacken the cable .
Next screw the cable connection(diag3) until the end of the indicator rod can be seen through the window of the right hand axle nut and is exactly level with the end of the hub axle.(diag1)
When the locknut (diag2) has been slackened the cable connection(diag3) can be screwed , make sure the lever is in the second gear position and the indicator rod is level(diag1)
If the gears still do not engage the cable is probably too tight or loose , the fulcrum clip (attached to rear stay) needs to be adjusted to tighten or slacken the cable. (Thanks to Yoda for this)
_________________________________________________
Refitting the Front Forks
Another simple but easy made mistake is Refitting the Headset the wrong way round.
Starting from the
Forks fit the ring groove upwards like so
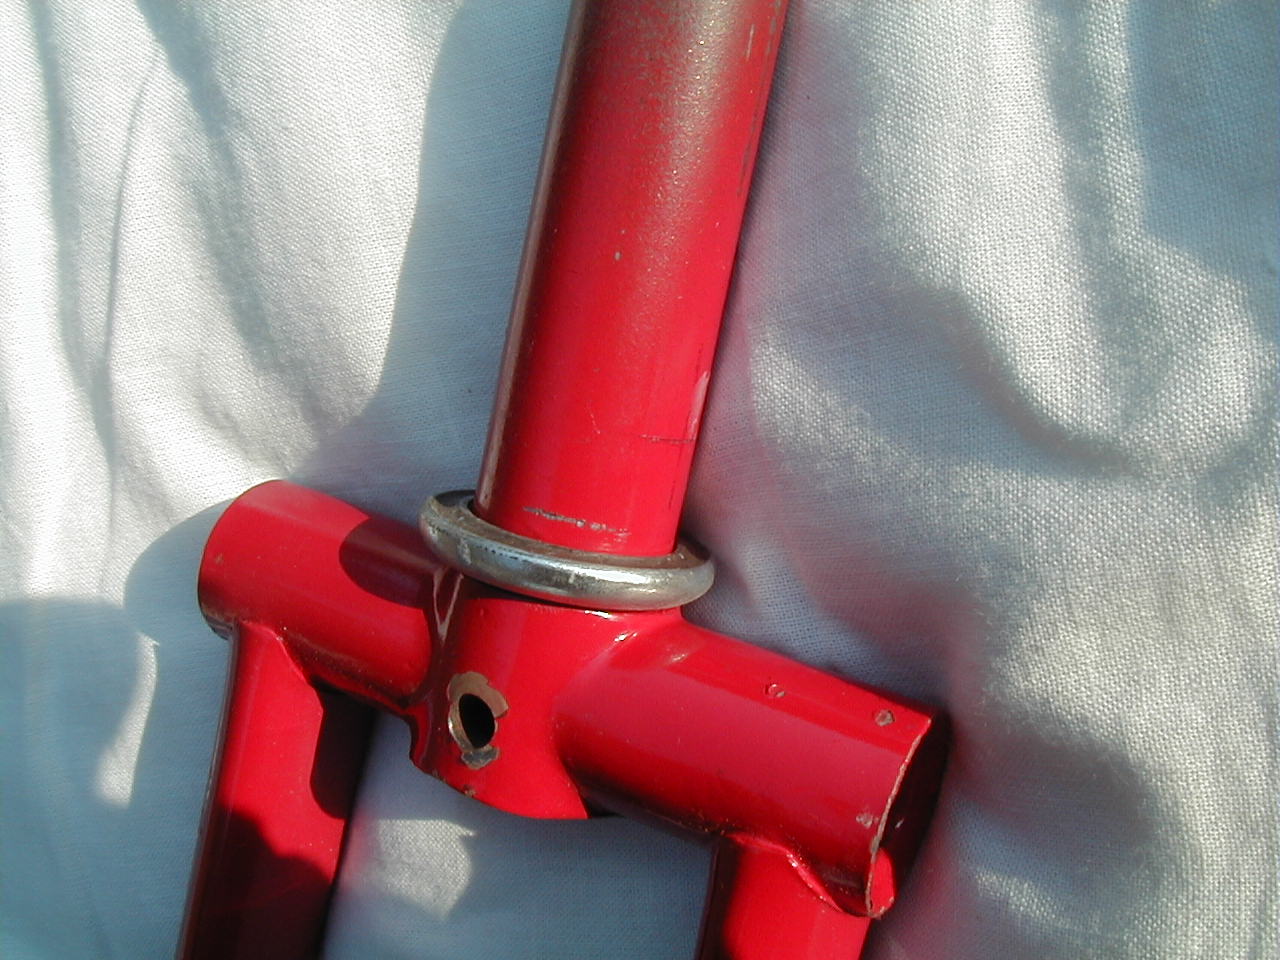
Click on the images to enlarge
Gently refit thr cups
in this order larger into the bottom of the frame smaller to top

Bearing in mind (get it) that the bearing have to be fitted in here they are size 5/32" and it makes easy work if you set them in a light grease, I normally get the Teflon grease in a tube from my local bike shop (it stinks like hell but is excellent)
So cups fitted
bearings in screw on the large head nut so:-  tighten finger tight make sure the forks turn freely and then fit the lamp
bracket.
tighten finger tight make sure the forks turn freely and then fit the lamp
bracket.
Now the tricky bit. Ever wondered what that groove is in the back of the handlebar tube?
you will need to
slide the small head nut up the handlebar tube like so:-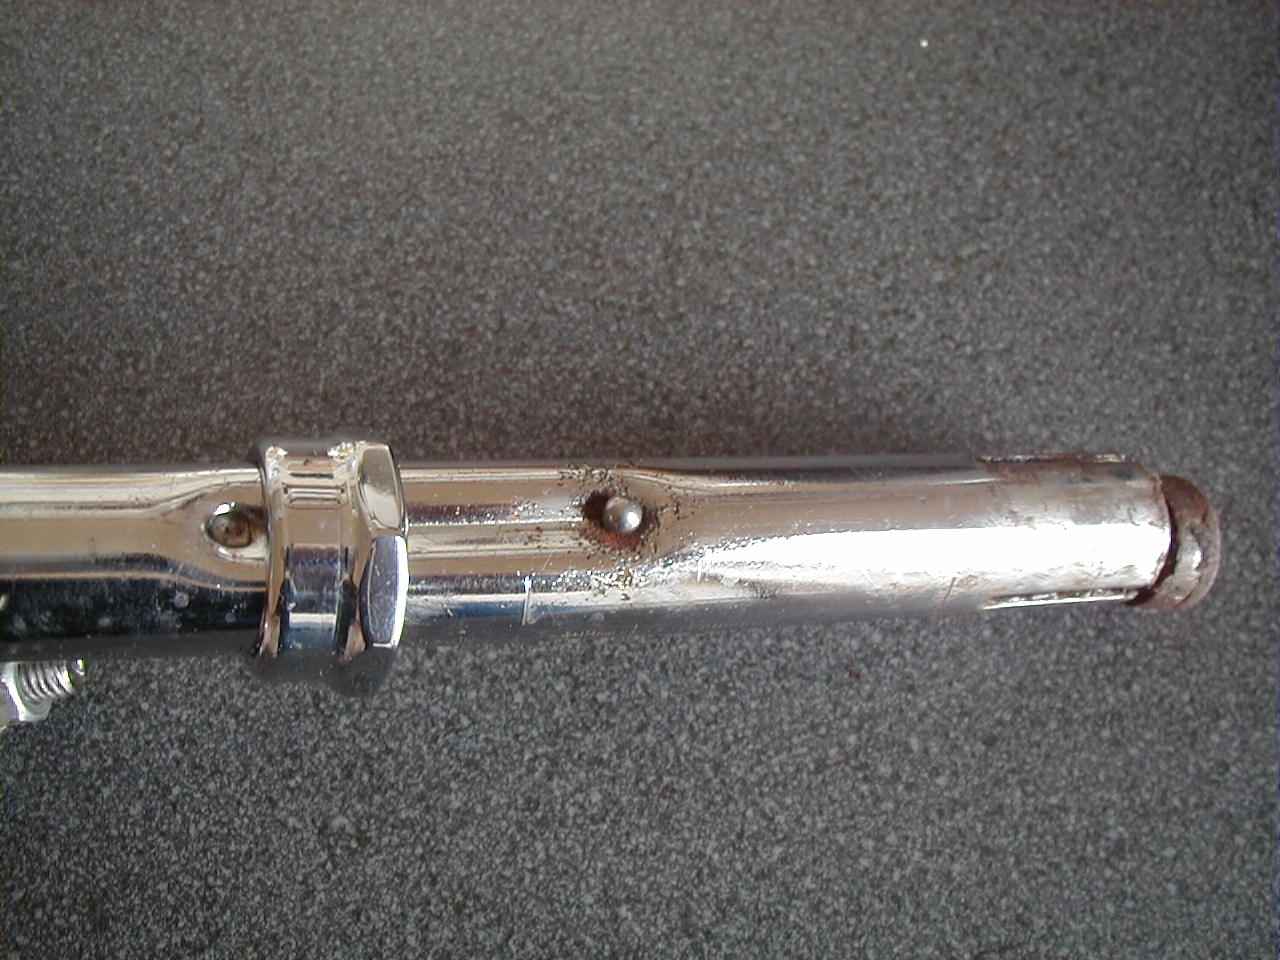
Slot the bars in the forks
Place a ball bearing same as in the groove then screw down the nut finally do all the necessary adjustments and bingo another bit of chopper built.
_________________________________________________
Question: Why is there a tight spot on the forks
Answer: There bent
Solution: Turn the forks back to front and gently drop the frame onto the floor forks down first from about 12" this will do the trick.
_________________________________________________
Coming up next That stubborn cotter pin followed by his mate the sissy bar.
Anyone who is having trouble with a Broken or Cracked Frame or cant get that sissy bar or seat tube etc out
Drop me an email to ircoc@btconnect.com and I will be obliged to help you out!
Kickstand
Removal Tool Exclusive to www.Raleigh-Chopper.net
|